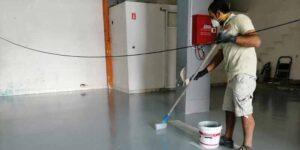
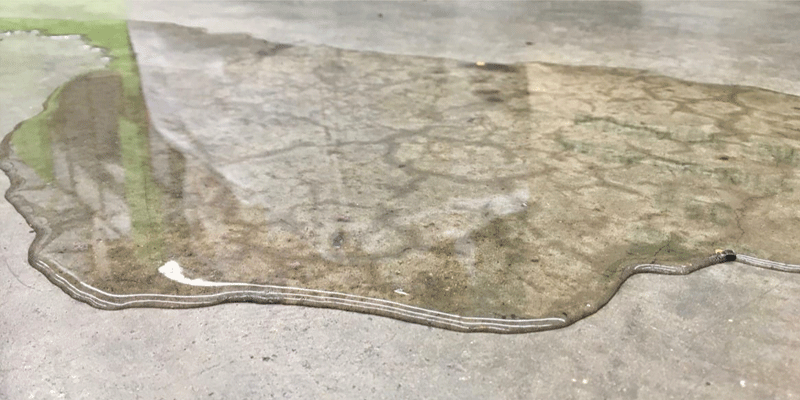
Simple Tips for Repairing Garage Epoxy Floors

Simple Tips for Repairing Garage Epoxy Floors
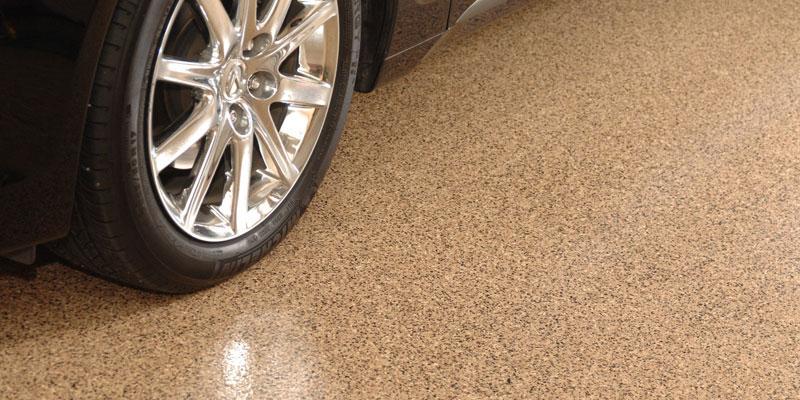
Simple Tips for Repairing Garage Epoxy Floors

By taking the time to repair your epoxy floor, you can help to extend its life and prevent future damage. If you are not comfortable repairing the floor yourself, you can always call a professional to do it for you. There are plenty of professional epoxy flooring companies that can help you get the job done right. Epoxy floors are very durable, but they can be damaged and worn out over years of use. When this happens, it is important to repair the floor so that it can continue to protect your investment and provide a safe surface to work on.
This article will provide some simple tips for repairing garage epoxy floors and ways to maintain them so that they last for years to come.

What is Epoxy Flooring and Where is it Common?

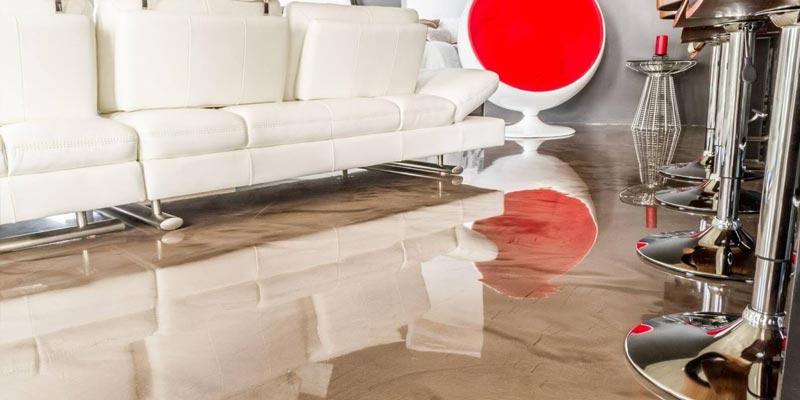
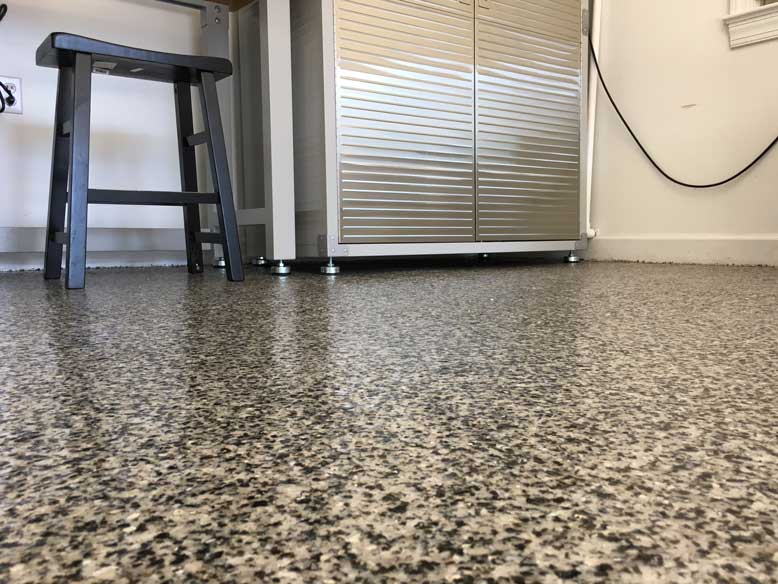
Epoxy flooring is a type of flooring that is made up of multiple layers of epoxy resin. It is common in both commercial and industrial settings because it is very durable and resistant to many different types of damage. This type of flooring can be found in factories, warehouses, showrooms, garages, and even some homes. The look of epoxy flooring can range from completely clear to a variety of different colors and designs. It is also possible to get epoxy flooring that has a non-slip surface, which is ideal for areas where there is a lot of foot traffic or where liquids are often present.

How to Repair Damaged Epoxy Flooring?

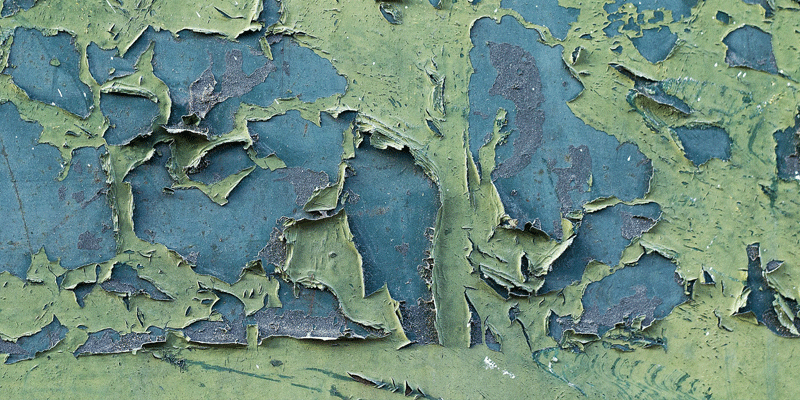
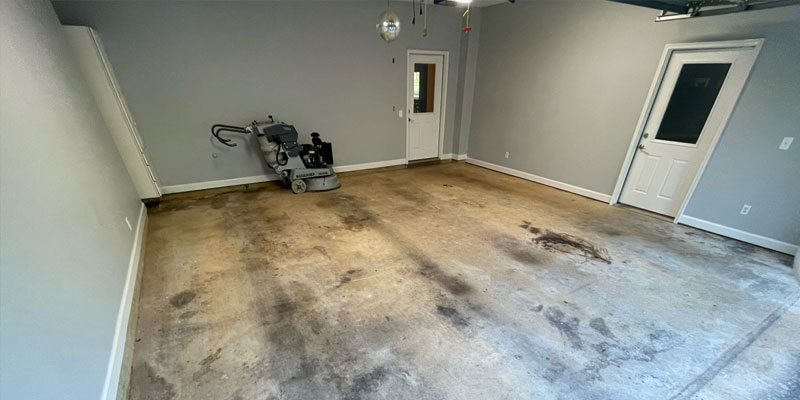
One of the most common ways that epoxy floors become damaged is from heavy traffic. Over time, the weight of vehicles and other equipment can cause cracks and chips in the flooring. If you notice any damage to your epoxy floor, it is important to repair it as soon as possible. The longer you wait to repair the damage, the more likely it is to spread and become worse. Here are some of the most important tips for repairing garage epoxy floors:

– Use a putty knife or another sharp object to remove any loose pieces of epoxy from the floor. Be sure to dispose of these pieces properly so that they do not become a trip hazard. It’s best to use a dustpan or broom to sweep them up.
– Clean the area around the damage with a degreaser or soap and water. This will help to remove any dirt, grease, or debris that could prevent the epoxy from bonding properly. A clean surface is essential for a successful repair.
– Mix together the epoxy resin and hardener according to the manufacturer’s instructions. Be sure to mix them together thoroughly so that they will cure properly. Instructions for mixing can be found on the packaging of the epoxy or online.
-Use products that are specifically designed for repairing epoxy floors. These products can be found at most hardware stores or online. Knowing how to repair garage epoxy floors is important for maintaining the life of your investment.
-If the job is way above your head, don’t hesitate to call a professional. A professional can come and assess the damage and give you an estimate for the repair. They will also be able to do the job quickly and correctly so that your floor looks as good as new.
-Do plenty of research before you hire a professional. Make sure that they have experience with repairing epoxy floors and that they use high-quality products. You should also get multiple estimates before you decide on a company to do the repairs.

Why is Repairing Epoxy Floors Important?

Repairing garage epoxy floors is important for a number of reasons. First, epoxy floors are an investment. They can be expensive to install, so you want to make sure that they last for as long as possible. Repairing damage when it first occurs can help to prevent the need for more extensive and expensive repairs down the road. When epoxy floors are well-maintained, they can last for many years. Another reason why repairing epoxy floors is important is for safety. Epoxy floors that are cracked or chipped can be very dangerous. They can cause trips and falls, which can lead to serious injuries.
Whether you are a business owner with an epoxy floor or a homeowner, it is important to know how to repair garage epoxy floors. By following these simple tips, you can keep your floor looking great and prevent costly repairs in the future. Epoxy flooring is a great investment, so it is important to take care of it. If you have any questions about epoxy flooring or need help with a repair, be sure to contact a professional or do plenty of research online. There are many resources available that can help you learn more about epoxy flooring. Knowing how to repair them and keep them looking their best will help you enjoy them for many years to come.

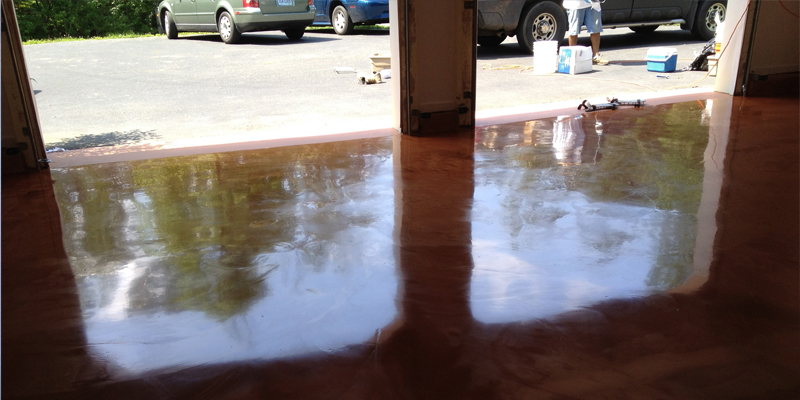
Recent Posts

What is the Chemical Makeup of Garage Floor Epoxy?

What is the Chemical Makeup of Garage Floor Epoxy?

What is the Chemical Makeup of Garage Floor Epoxy?

Are you looking to have a new garage floor installed? Epoxy coating has many benefits that make it ideal for coating garage floors. It is a durable, long-lasting material that is resistant to many common chemicals and spills. Epoxy is also easy to clean and maintain. Not only does it improve the look of your garage, but it also protects the concrete beneath it. In this article, we will take a closer look at the chemical makeup of epoxy and how it helps to create such a durable, long-lasting garage floor coating.

What is Epoxy, and How is it Used?

Epoxy is a thermosetting plastic material that is created by the reaction of two compounds, a resin and a hardener. When these two compounds are mixed together, they create a chemical reaction that causes the epoxy to harden into a solid material. Once it has hardened, it can no longer be softened or melted. This makes epoxy an ideal material for creating durable coatings and adhesives. Epoxy is used in a variety of ways, including in the construction industry and for making household goods such as coatings for countertops and flooring.

The Chemical Makeup of Epoxy

The resin and hardener are the two main components of epoxy. The resin is typically made up of glycidyl ethers or polyglycidyl esters of phenols. The hardener is usually an amine, such as diethylamine or hexamethylenediamine. When these two compounds are mixed together, they create a chemical reaction that causes the epoxy to harden into a solid material. This chemical reaction is known as curing.

The ratio of resin to the hardener can vary depending on the type of epoxy being used. For example, a 1:1 ratio is typically used for adhesives, while a 2:1 ratio is more common for coatings. The ratio can also be adjusted to change the properties of the epoxy. For instance, adding more hardener will make the epoxy harder and more brittle, while adding more resin will make it softer and more flexible.

What are the Benefits of Coating Garage Floors with Epoxy?

There are many benefits to coating garage floors with epoxy so let’s take a look at some of the most popular ones:

Epoxy is a durable material that can resist many common chemicals and spills:

This is one of the most important benefits of epoxy because it means that your garage floor will be protected from oil spills, gasoline spills, and many other common chemicals. If you have a garage floor that is not protected by epoxy, then you will have to worry about these spills causing damage to the concrete. Coating your garage floor with epoxy will give you peace of mind knowing that your floor is protected.

Epoxy is easy to clean and maintain:

Another great benefit of epoxy is that it is very easy to clean and maintain. All you need to do is sweep or vacuum up any dirt or debris and then mop the floor with soapy water. You don’t have to worry about scrubbing the floor or using harsh chemicals. Epoxy is also stain-resistant, so you don’t have to worry about spills damaging the floor.

Epoxy improves the look of your garage:

In addition to being durable and easy to clean, epoxy also improves the look of your garage. It can give your garage a high-quality, professional look. Epoxy is available in a variety of colors, so you can choose the one that best fits your style. You can also add flakes or other materials to the epoxy to create a unique look. No matter what style you are going for, epoxy can help you achieve it.

Epoxy protects the concrete beneath it:

One of the most important benefits of epoxy is that it protects the concrete beneath it. Garage floors are often made of concrete, which can be damaged by spills and chemicals. When you coat your floor with epoxy, you are creating a barrier between the concrete and anything that could potentially damage it. This will help to extend the life of your garage floor and keep it looking its best. By protecting the concrete, you are also protecting the foundation of your home. Overall there are many benefits to coating your garage floor with epoxy.

Knowing the chemical makeup of epoxy is the first step in understanding this versatile material. Epoxy is a strong and durable material that can be used in many different ways. It is easy to clean and maintain, and it can improve the look of your garage. Most importantly, epoxy protects the concrete beneath it, which helps to extend the life of your garage floor. If you are thinking about coating your garage floor, then epoxy is a great option to consider. Not only will your garage look better, but it will add to the value of your home or business.

Recent Posts

Peeling Epoxy Floors: Repairs and Prevention

Peeling Epoxy Floors: Repairs and Prevention

Peeling Epoxy Floors: Repairs and Prevention

You may be wondering what can cause peeling epoxy floors. This article will discuss some of the common reasons for this problem and how to fix them. Also, read on to learn about the best ways to prevent this problem from happening again! Follow these steps to make sure your floors stay beautiful and protect their investment.

Problems with Peeling Epoxy Floors

There are many reasons why you may experience problems with peeling epoxy floors. Whether it is improper preparation or the wrong application, a poorly prepared floor can lead to peeling epoxy. Concrete flooring needs to be free of debris, sand, and oil before an epoxy coating can be applied. If the floor is not completely clean, the epoxy may pull away from the concrete and cause round holes and fisheyes. Here are some tips to help prevent this problem.

When applying epoxy, you should ensure that you are applying it evenly. Otherwise, you risk discoloration or a yellowed floor. Mixing the resin and activator correctly is essential in minimizing the chances of peeling and blistering. Make sure to follow all safety guidelines while applying the material to prevent damage to your floor. If you’ve tried mixing the epoxy yourself, you may be disappointed with the end result.

In addition to improper application, improper preparation can lead to peeling and discoloration. Poor preparation and improper mixing of the flooring compound can cause the floor to peel and become a tripping hazard. Proper prep is critical to preventing these issues. Ensure the floor is thoroughly clean before applying the coating. Make sure to use a quality primer and choose the proper coatings and paints to prevent peeling.

Before applying the epoxy coating, it’s important to prepare the concrete. If the concrete is wet, moisture can cause peeling and bubbling. Removing grease, oil, or petroleum-based lubricants on the floor is also important. This may also cause a floor to have fish eyes. Lastly, if the floor is not completely dry, air entrainment will cause the surface to crack and peel.

One of the most common reasons for garage floor epoxy to peel is improper preparation. Properly prepared concrete will be easier to apply and remove than poorly prepared one. Proper preparation can prevent problems with peeling epoxy floors by improving concrete’s porosity and cleaning ability. Incorrect preparation can also lead to uneven color. For example, improper concrete preparation can cause peeling epoxy to crack. Proper preparation and testing are crucial to ensure the floor will be durable and long-lasting.

Prevention

To avoid the problem of peeling epoxy floors, you should ensure that the floor is completely dry before putting on the coating. The epoxy will not adhere to a wet or dirty concrete floor, so you should always make sure the floor is clean before applying the coating. This process will also increase the adhesion of the epoxy coating to the concrete surface. Peeling epoxy floors can occur once the coating has been applied. If you don’t follow these instructions, you may end up with a floor that peels after a few months.

Another common cause of peeling epoxy floors is improper floor preparation and environment. If the concrete is not properly prepared, the epoxy will not adhere properly and may cause round holes or fisheyes in the finish. To prevent peeling epoxy floors, make sure that you have a smooth and level surface. In addition, the environment should be ideal, with the right temperature and humidity. If the weather is too hot or too cold, the epoxy will not adhere to the floor.

When applying epoxy, be sure to clean the floor thoroughly. Even if you live in a climate-controlled environment, the resin may still peel after a few weeks or months. To avoid peeling epoxy floors, clean the floor well before the professional arrives. Using water for a day or two before the application will allow the epoxy resin to dry and cure before the professional can start working on the installation. In addition, if the floor is porous, don’t use water right before the application date, as it may dry and cause the adhesive to fail.

Another common cause of peeling epoxy floors is moisture. While moisture can’t penetrate the epoxy coating, water vapor can. This causes hydrostatic pressure to lift the coating off the surface. You can spot signs of moisture problems by looking for dark spots or efflorescence on the floor. Additionally, if the slab is below grade, you should always check it with a moisture test. If you notice any of these symptoms, you should immediately take action.

Preventing peeling epoxy floors starts with a clean garage floor. Make sure to sweep away any dirt and debris accumulated on the floor. If you can’t remove the dirt and dust, use a commercial degreaser to get rid of the oil stains. This will ensure that the epoxy coating lasts for many years. If you follow these tips, you can prevent peeling epoxy.

Repair

In many cases, a small crack or fissure in an epoxy floor can be repaired with a standard epoxy floor paint kit. While this repair process may require a few hours, it can also correct the problem. While cracks can be repaired by resurfacing the entire floor, more minor cracks and scratches are easier to correct. Here are some tips to repair a small crack or scratch:

Sand the area using a palm sander. This is especially useful for edges that are close to the wall. You should leave the floor to dry for 24 hours before applying another layer of epoxy. A good hand sander is available at most home supply stores. Then, using the hand sander, apply another coat. Allow the floor to dry thoroughly before stepping on it. When finished, you should use a 2-part epoxy.

If you have localized problems, patching the area instead of ripping out the floor is a good idea. While this solution might be easier than tearing out the entire floor, it will leave visible seams that will pick up dirt. If you have trouble patching, consulting a licensed professional for assistance may be worth consulting. And don’t forget that epoxy floors are costly! If you have a small budget, you can choose to replace your existing floor with a new one, but that’s not always an option. And if you can’t afford a new floor, you might want to repair your old flooring material to keep it in good condition.

One thing you should know about epoxy flooring is that it’s highly sensitive to temperature changes. Because it hardens rapidly when it comes into contact with hardeners, it can also cause peeling or chipping in areas. Therefore, before attempting to repair a peeling epoxy floor, you must first check whether the substrate is sufficiently solid before applying the epoxy coating. Ensure that the substrate has a consistent moisture content, as too much humidity can cause a problem with the epoxy’s adhesion.

Now that you have a better understanding of epoxy as a material and how to prevent peeling, you can decide if an epoxy coating is right for your floors. Contact us today and receive a free estimate on epoxy installation and maintenance.

Recent Posts

Oil Stained Garage Flooring: How to Remove Oil Stains

Oil Stained Garage Flooring: How to Remove Oil Stains

Oil Stained Garage Flooring: How to Remove Oil Stains

For many of us, our garage is an extension of our home. We use it to store our cars, tools, and other belongings. But what do you do when your garage floor becomes stained with oil?

Oil stains are not only unsightly, but they can also be difficult to remove. If you’re dealing with an oil stain on your garage floor, we know how frustrating it can be. But don’t worry, we’re here to help!

In this article, we’ll show you how to remove oil stains from your garage floor. We’ll also provide some tips on preventing oil stains in the future.

So, let’s get started!

The first step is to identify the type of oil that stained your floor. Common types of oil include motor oil, cooking oil, and transmission fluid. Once you know the type of oil, you can select the appropriate cleaning solution.

For light stains, you can use a detergent or degreaser. Apply the solution to the stain and scrub with a brush or sponge. Rinse the area with water and allow it to dry.

For tougher stains, you may need to use a stronger cleaning solution. You can purchase a commercial oil remover or make your own. To make your own, mix 1 part dish soap with 2 parts baking soda and 3 parts warm water. Apply the mixture to the stain and scrub with a brush or sponge. Rinse the area with water and allow it to dry.

Once the stain is gone, you’ll want to take steps to prevent it from happening again. One way to do this is to apply a sealant or coating to your garage floor. This will create a barrier between your floor and any oil that comes into contact with it. You can also try using absorbent mats or pads in high-traffic areas.

How to Prevent Oil Stains

There are a few things you can do to prevent oil stains on your garage floor. One way is to apply a sealant or coating to the floor. This will create a barrier between the floor and any oil that comes into contact with it. You can also try using absorbent mats or pads in high-traffic areas.

Another way to prevent oil stains is to clean up spills immediately. If you spill oil on your floor, soak up the excess with a rag or paper towel. Then, wash the area with soap and water.

Old Oil Stains vs. New Oil Stains

There’s a big difference between an old oil stain and a new oil stain. An old stain has had time to set and can be much more difficult to remove. A new stain is easier to clean because it’s still fresh.

If you’re dealing with an old oil stain, you’ll need to use a stronger cleaning solution. You can purchase a commercial oil remover or make your own. To make your own, mix 1 part dish soap with 2 parts baking soda and 3 parts warm water. Apply the mixture to the stain and scrub with a brush or sponge. Rinse the area with water and allow it to dry.

For new stains, you can use a detergent or degreaser. Apply the solution to the stain and scrub with a brush or sponge. Rinse the area with water and allow it to dry.

Different Types of Oil Stains

There are different types of oil stains, and each one requires a different cleaning method. The most common types of oil stains are motor oil, cooking oil, and transmission fluid.

Motor oil stains can be removed with a detergent or degreaser. Apply the solution to the stain and scrub with a brush or sponge. Rinse the area with water and allow it to dry.

Cooking oil stains can be removed with a detergent or degreaser. Apply the solution to the stain and scrub with a brush or sponge. Rinse the area with water and allow it to dry.

Transmission fluid stains can be removed with a stronger cleaning solution. You can purchase a commercial oil remover or make your own. To make your own, mix 1 part dish soap with 2 parts baking soda and 3 parts warm water. Apply the mixture to the stain and scrub with a brush or sponge. Rinse the area with water and allow it to dry.

Final Thoughts

In this article, we’ve shown you how to remove oil stains from your garage floor. We’ve also given you some tips on how to prevent oil stains in the future.

If you have any questions or comments, please reach out to us directly. We’d love to hear from you! Don’t hesitate to reach out for assistance if you need it. Our team has years of experience and is more than happy to help you get your garage floor looking its best.

Recent Posts

10 Business Benefits of Installing an Epoxy Floor

10 Business Benefits of Installing an Epoxy Floor

10 Business Benefits of Installing an Epoxy Floor

7 Creative Ways You Can Decorate Your Home

Do you need a new floor for your business? If so, you may want to consider an epoxy floor coating. These surfaces are not only durable, but they also offer a number of other advantages for businesses. In this article, we’ll start by covering all of the basic facts on commercial epoxy flooring before moving on to the top 10 benefits that this type of flooring can provide for businesses.

What Is Epoxy Flooring?

Epoxy flooring is a system in which two materials are combined to create a hard, seamless surface. The first material is epoxy resin, and the second is a cross-linking agent. When these two materials are mixed together and applied to a floor, they cure to form a single, solid piece.

Epoxy floors are most commonly used in industrial and commercial settings because of their extreme durability. However, they can also be used in residential settings.

Benefits of Epoxy Flooring for Businesses

1. Enhanced Safety: One of the biggest advantages of epoxy floors is the fact that they can enhance safety in the workplace. These floors are slip-resistant, which means that they can help to prevent slips, trips, and falls. In addition, epoxy floors are also fire resistant. This can be a great asset in businesses that use a lot of flammable materials.

2. Improved Aesthetics: Epoxy floors can also improve the aesthetics of a business space. These floors are available in a wide range of colors and finishes, so businesses can choose the look that best suits their needs. Epoxy flooring can also be used to create patterns and designs, which can add interest and visual appeal to a space.

3. Enhanced Durability: As we mentioned before, epoxy floors are extremely durable. In fact, they are one of the most durable types of flooring on the market. They are able to withstand heavy foot traffic and equipment, and they are resistant to stains, chemicals, and abrasion. This means that epoxy floors require very little maintenance and can last for many years.

4. Easy Maintenance: Speaking of maintenance, epoxy floors are very easy to care for. These floors can be swept, mopped, and vacuumed just like any other type of floor. In addition, epoxy floors are resistant to staining, so spills can be quickly cleaned up without worry.

5. Cost-Effective: Epoxy floors are also a very cost-effective option for businesses. These floors are typically less expensive than other types of commercial flooring, and they can last for many years with proper care. This means that businesses can save money in the long run by choosing epoxy flooring.

6. Minimal Downtime: Another great advantage of epoxy floors is the fact that they can be installed quickly and with minimal disruption to business operations. In most cases, epoxy floors can be installed in just a few days. This means that businesses can get back to their regular routines quickly and without any major interruptions.

7. Increased Productivity: Epoxy floors can also help to increase productivity in the workplace. These floors are easy to clean and maintain, which means that employees won’t have to waste time cleaning or repairing them. In addition, epoxy floors are slip-resistant, which can help to reduce the number of accidents in the workplace.

8. Environmentally Friendly: Epoxy floors are also a very environmentally friendly option for businesses. These floors are made from recycled materials, and they can be reused or recycled at the end of their lifespan. In addition, epoxy floors emit very low levels of VOCs (volatile organic compounds), so they are safe for indoor air quality.

9. Versatile: Epoxy floors are also very versatile and can be used in a variety of settings. These floors can be installed in office buildings, warehouses, factories, retail stores, and more. In addition, epoxy floors can be customized to meet the specific needs of a business.

10. Long-Lasting: Finally, epoxy floors are very long-lasting and can provide many years of use. With proper care and maintenance, epoxy floors can last for 20 years or more. This makes them a wise investment for businesses that want to get the most out of their flooring budget.

Epoxy floors offer a variety of benefits for businesses, including enhanced safety, improved aesthetics, increased durability, easy maintenance, and cost-effectiveness. These floors are also versatile and long-lasting, making them a wise investment for any business!

If you’re ready to transform the floors of your business space, remember to avoid any at-home or DIY epoxy kits. These products are often inferior to professional-grade epoxy and can cause more harm than good.

Instead, trust our experts to get the job done right! We have years of experience installing epoxy floors in a variety of settings and can help you choose the right flooring for your needs. Contact us today to learn more about our services or to schedule a free consultation. We can help with everything from epoxy floor installation to floor repair and maintenance.

Recent Posts

Can I Apply an Epoxy Coating? 10 Helpful Tips

Can I Apply an Epoxy Coating? 10 Helpful Tips

Can I Apply an Epoxy Coating? 10 Helpful Tips

epoxy floor

Does your floor look old and dull? If so, you may be considering applying an epoxy coating. Epoxy coatings are a great way to give your floor a new lease on life. Not only will it make your floor look great, but it will also protect it from wear and tear.

If you’re thinking about applying an epoxy coating, there are a few things you should know. In this article, we’ll give you the basics of epoxy coating and ten helpful tips for applying epoxy coating.

What is an Epoxy Coating, and Why Would I Use It?

An epoxy coating is a type of floor coating that is made up of two parts: the epoxy resin and the hardener. When these two parts are mixed together, they create a strong, durable bond that can protect your floors from wear and tear. Epoxy coatings are also resistant to water, oil, and grease, making them ideal for kitchens and other areas where spills are common.

There are many reasons why you might choose to apply an epoxy coating to your floor. Perhaps you want to give your kitchen a makeover, or you’re looking for a way to protect your garage floor from stains and spills. No matter what your reason is, epoxy coatings can give your floors the protection they need.

How to Apply an Epoxy Coating

Now that you know what an epoxy coating is and why you might use it, let’s talk about how to apply it. Applying an epoxy coating is not as difficult as you might think, but there are a few things you need to know before you get started.

1. The first thing you need to do is clean your floor. Any dirt, dust, or grease on your floor will prevent the epoxy from adhering properly. Be sure to sweep and mop your floor thoroughly before you begin.

2. Once your floor is clean, it’s time to mix the epoxy resin and hardener together. Be sure to follow the instructions on the packaging, as the mixing ratio can vary depending on the brand.

3. Once the epoxy is mixed, it’s time to apply it to your floor. You can do this with a paint roller or a brush. Be sure to work in small sections so that the epoxy doesn’t dry before you have a chance to spread it evenly.

4. Once you’ve applied the epoxy, you need to let it cure. This usually takes 24-48 hours. During this time, you’ll need to keep your floor free of traffic. Once the epoxy has cured, you can enjoy your new and improved floor!

Now that you know how to apply an epoxy coating, here are ten helpful tips to make the process go smoothly:

1. Be sure to clean your floor thoroughly before you begin. Any dirt or dust will prevent the epoxy from adhering properly.

2. Mix the epoxy resin and hardener together in the correct ratio. Be sure to follow the instructions on the packaging.

3. Apply the epoxy in small sections so that it doesn’t dry before you have a chance to spread it evenly.

4. Let the epoxy cure for 24-48 hours before walking on it.

5. If you’re applying an epoxy coating to a kitchen floor, be sure to choose a slip-resistant variety.

6. If you’re not working in a well-ventilated area, you may want to wear a respirator to avoid breathing in fumes.

7. If you’re applying an epoxy coating to a garage floor, be sure to choose a variety that is resistant to oil and grease stains.

8. Epoxy coatings can be susceptible to UV damage, so be sure to apply a topcoat if your floor will be exposed to direct sunlight.

9. Be sure to follow the manufacturer’s instructions for cleaning and maintenance of your epoxy-coated floor.

10. If you have any questions or concerns about applying an epoxy coating, be sure to consult with a professional before you get started.

Applying an epoxy coating to your floor is a great way to give it a new lease on life. With these ten helpful tips, you can be sure that the process will go smoothly, and your floor will look great for years to come.

Consider Hiring an Epoxy Professional For Your New Floors

There are many reasons why you might choose to apply an epoxy coating to your floor. Perhaps you want to give your kitchen a makeover, or you’re looking for a way to protect your garage floor from stains and spills. No matter what your reason is, epoxy coatings can give your floors the protection they need.

While it’s possible to apply an epoxy coating yourself, there are several benefits to hiring a professional. First of all, professionals have the experience and knowledge necessary to ensure that the job is done properly. They also have access to higher-quality products that will last longer and look better than the products you can find at your local hardware store.

If you’re considering applying an epoxy coating to your floor, be sure to contact a professional for more information. With their help, you can give your floors the protection they need to last for years of use.

Recent Posts

Helpful Tips to Deal With an Uneven Epoxy Floor

Helpful Tips to Deal With an Uneven Epoxy Floor

Helpful Tips to Deal With an Uneven Epoxy Floor

7 Creative Ways You Can Decorate Your Home

With all of the different projects that you may take on around your home, it is inevitable that, at some point, you will come across an uneven surface. Whether it’s a crack in the sidewalk or a small dent in your wall, these imperfections can be frustrating to deal with. The same goes for an uneven epoxy floor.

While an epoxy floor coating can give your home a sleek and polished look, an uneven surface can ruin the overall aesthetic. Not to mention, an uneven epoxy floor can also be dangerous.

In this article, we’ll give you some helpful tips on how to deal with an uneven epoxy floor. First, we’ll take a closer look at what epoxy is and how it is applied. Then, we’ll go over some of the common causes of an uneven epoxy floor. Finally, we’ll give you some tips on how to fix an uneven epoxy floor.

What is an Epoxy Floor?

Epoxy is a type of resin that is often used as a coating for floors. It is a durable material that can resist scratches and stains. Epoxy is typically applied in two coats. The first coat is called the basecoat, and the second coat is called the topcoat.

The basecoat is responsible for providing the foundation for the topcoat. It also helps to protect the floor from wear and tear. The topcoat is what gives the floor its glossy finish. It also provides additional protection against stains and scratches.

How is an Epoxy Floor Applied?

Epoxy floors are usually applied by professional contractors. The first step is to prepare the floor by cleaning it and removing any debris. Next, the contractor will apply the base coat to the floor. Once the base coat has dried, they will apply the topcoat.

It is important to note that epoxy floors must be allowed to cure before they can be used. This process can take anywhere from 24 to 72 hours.

Common Causes of an Uneven Epoxy Floor

There are a few different reasons why an epoxy floor might become uneven. One of the most common causes is improper preparation of the floor before the coating is applied. If the floor is not cleaned properly or if there is debris on the surface, it can cause the epoxy to not adhere properly.

Another common cause of an uneven epoxy floor is applying the coating in humid or wet conditions. This can cause the epoxy to not cure properly and can lead to an uneven surface.

Finally, an uneven epoxy floor can be caused by walking on the floor before it has had a chance to fully cure. This can leave footprints or other imperfections in the coating.

How to Fix an Uneven Epoxy Floor

If you have an uneven epoxy floor, there are a few things that you can do to fix it. First, you will need to determine what caused the problem. If the issue was due to improper preparation of the floor, you will need to make sure that the floor is clean and free of debris before applying the coating.

If the problem was caused by applying the coating in humid or wet conditions, you will need to wait for the floor to dry completely before proceeding. Finally, if the unevenness was caused by walking on the floor before it had a chance to cure, you will need to sand down the footprints or other imperfections.

Once you have determined what caused the problem, you can begin fixing the uneven epoxy floor. First, you will need to remove any existing coatings from the floor. This can be done with a stripper or a sander. Next, you will need to clean the floor and remove any debris.

Once the floor is clean, you will need to apply a new basecoat. Once the base coat has dried, you can then apply the topcoat. Finally, you will need to allow the floor to cure for 24 to 72 hours before using it.

Fixing an uneven epoxy floor can be a bit of a hassle. However, by following these steps, you can fix the problem and have a beautiful, smooth floor in no time.

Consider Hiring a Professional for Epoxy Repairs

While it is possible to repair an uneven epoxy floor on your own, it is often best to hire a professional. Professional contractors have the experience and expertise necessary to ensure that the job is done properly.

In addition, professional contractors usually offer warranties on their work. This can give you peace of mind in knowing that your floor will be repaired properly and will last for many years to come.

If you are considering repairing your uneven epoxy floor, be sure to contact a professional contractor today. They can ensure the process is done properly and can help you achieve the beautiful, smooth floor that you desire.

Recent Posts

Which Epoxy Floor Thickness Is Right For Me?

Which Epoxy Floor Thickness Is Right For Me?

7 Creative Ways You Can Decorate Your Home With Epoxy

epoxy floor thickness

Does your concrete need a little help? If it’s cracked, chipped, or generally looks worse for wear, epoxy flooring can give it new life. But before you start the project, you need to know which epoxy floor thickness is right for your needs. This article will have all the basic facts about epoxy flooring every property owner should know, as well as the different thickness levels available.

What is an Epoxy Floor?

epoxy floor

Epoxy flooring is a type of floor coating that’s made up of several different components. The base is usually epoxy resin, with a hardener added to cure the material. Once it’s cured, epoxy flooring is one of the most durable types of flooring you can get. It’s resistant to scratches, staining, and fading, and it can even stand up to heavy foot traffic and machinery.

This material is so tough, in fact, that it’s often used in industrial and commercial settings. But epoxy flooring isn’t just for factepoxy floorories and warehouses anymore. It’s becoming increasingly popular in residential settings as well, thanks to its low maintenance and high durability.
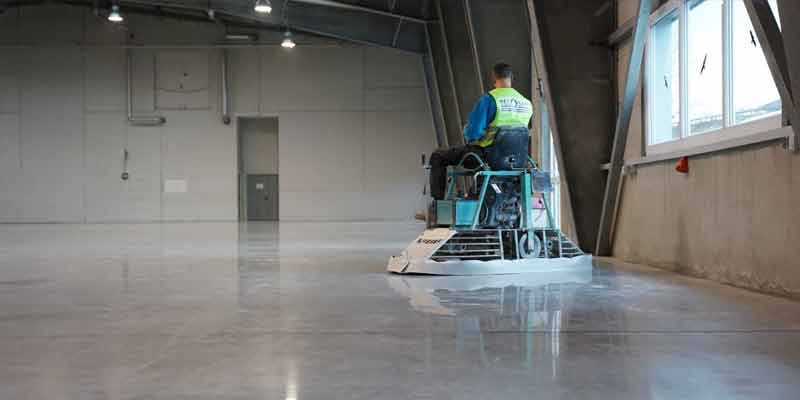
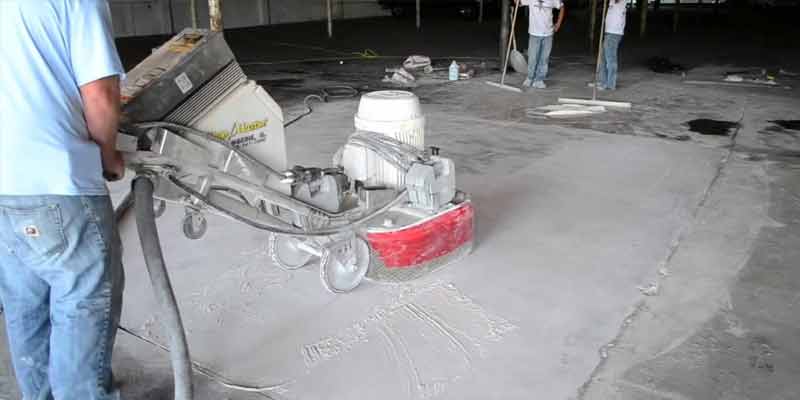
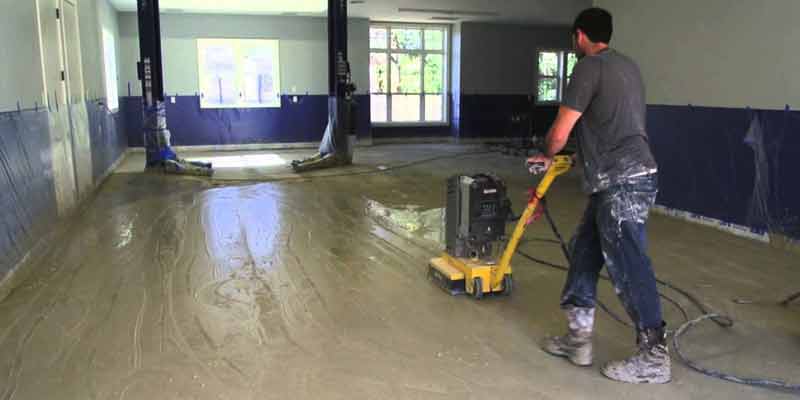
Epoxy Floor Thickness Levels


Now that you know a little more about epoxy flooring, let’s talk about thickness. This material is available in various thickness levels, from thin mils to thick coatings. The right thickness for your floor will depend on a few different factors, including:

The condition of your concrete – If your concrete is in good condition, you may only need a thin layer of epoxy to protect it. But if it’s cracked or damaged, you’ll need a thicker coating to cover up the imperfections.

The amount of traffic your floor gets – If your floor sees a lot of foot traffic, you’ll need a thicker epoxy coating to protect it from wear and tear.

Your budget – Epoxy flooring is available at a wide range of prices, so you can find an option that fits your budget.

Now that you know the different factors to consider when choosing an epoxy floor thickness, let’s take a look at the different options available.

Mil Thicknesses

The thinnest type of epoxy flooring is called a mil, and it’s typically only about 1-2mm thick. This is enough to provide a basic level of protection for your concrete, but it will not stand up to heavy traffic or machinery. Mil epoxy is a good choice for residential garages that don’t see a lot of use.

Small Chip Flooring

If you’re looking for something with a little more personality, small chip flooring might be the right option for you. This type of epoxy is made with small chips or flakes of color added to the base material. The chips can be made from stone, glass, or metal, and they add both visual interest and extra durability to the floor.

Small chip epoxy is available in thicknesses ranging from 3-4mm. This is enough to protect your floor from light foot traffic and occasional spills, but it will not stand up to heavy use.

Quartz Flooring

Quartz flooring is a good option if you need a durable floor that can stand up to heavy traffic. This type of epoxy is made with quartz sand added to the base material. The quartz provides extra durability and traction, making it a good choice for areas that see a lot of foot traffic.

Quartz epoxy is available in thicknesses ranging from 4-6mm. This is enough to protect your floor from heavy traffic and occasional spills, but it’s not going to stand up to constant exposure to chemicals or abrasives.

Metallic Flooring

Metallic flooring is another option for those who need a durable epoxy floor. This type of epoxy is made with metallic pigments added to the base material. The pigments add extra durability and a unique look to the floor.

Metallic epoxy is available in thicknesses ranging from 4-6mm. This is enough to protect your floor from heavy traffic and occasional spills.

High Build Flooring

If you’re looking for the most durable type of epoxy flooring, a high build is a way to go. This type of epoxy is made with multiple layers of material, each one cured before the next is applied. High-build epoxy floors are typically 8-10mm thick, making them almost indestructible.

High build epoxy is a good choice for areas that see heavy traffic or exposure to chemicals and abrasives. This type of flooring is also good for hiding imperfections in the concrete.

Should I DIY My Epoxy Floor?

If you’re planning to install an epoxy floor in your home, you may be wondering if you should do it yourself or hire a professional. The answer will depend on a few different factors, including:

The size of your project – If you’re only doing a small area, like a garage or basement, DIY may be the way to go. But if you’re doing a large area, like commercial space, it’s best to hire a professional.

Your level of experience – If you’ve never done an epoxy floor before, it’s best to leave it to the pros. But if you have some experience with this type of project, DIY may be an option for you.

Your budget – Hiring a professional to install your epoxy floor will cost more than doing it yourself, but it may be worth the investment if you want a high-quality job.

The type of flooring you’re using – If you’re using a high build epoxy, it’s best to hire a professional. But if you’re using a thinner flooring, like mil epoxy, DIY may be an option.

So, which epoxy floor thickness is right for you? It all depends on your needs and budget. If you need a durable floor that can stand up to heavy traffic, choose a 4-6mm thickness. For a more budget-friendly option, choose a thinner mil epoxy. And for an easy DIY project, consider small chip epoxy. Whatever you choose, be sure to follow the manufacturer’s instructions for the best results.

Recent Posts

Concrete Grinding: 10 Tips for Cleaning After Grinding

Concrete Grinding: 10 Tips for Cleaning After Grinding

Concrete Grinding: 10 Tips for Cleaning After Grinding

grinding polishing

If you’re looking for a way to spruce up your concrete flooring, concrete grinding may be the perfect solution. Grinding can remove old paint or stains, level out uneven floors, and provide a smooth surface for painting or polishing. But what many people don’t realize is that cleaning up after concrete grinding services is just as important as the grinding itself.

This article will provide you with ten tips on how to clean up after concrete grinding so that you can get the most out of your new flooring.

1. Immediately after grinding, sweep up any loose debris and dust. A broom and dustpan should do the trick, but you may also want to vacuum if there is a lot of debris.

2. Inspect your floor for any areas that need more grinding. If there are any high spots or uneven areas, grind them down until they are level with the rest of the floor.

3. Once your floor is completely smooth, it’s time to start cleaning! Use a pH-neutral cleaner and a soft mop to clean the floor gently. Be sure to avoid any harsh cleaners or abrasive pads, as these can damage the floor.

4. Rinse your floor with clean water and allow it to air dry.

5. Apply a sealer to the floor if desired. This will help protect the floor from stains and dirt.

6. If you are painting your floor, now is the time to do so! Be sure to use quality concrete paint designed for floors.

7. Once the paint is dry, buff the floor with a soft cloth to remove any excess paint.

8. Finally, apply wax to the floor if desired. This will help keep the paint looking fresh and will make it easier to clean in the future.

9. Enjoy your new, clean floor!

10. Remember to sweep and mop your floor regularly to keep it looking its best.

Why is Cleaning After Grinding So Important?

Cleaning up after concrete grinding is important for a number of reasons. First, it helps to ensure that your new flooring looks its best. If there is any debris or dirt left behind, it can dull the appearance of your floor. Second, it helps to protect your floor from stains and damage. Harsh cleaners and abrasive pads can damage the floor, so it’s important to avoid them. Finally, regular cleaning will help to extend the life of your floor.

Should a Professional Grind My Concrete Floors?

polish concrete

While it is possible to grind concrete floors yourself, it’s best to leave the job to a professional. Concrete grinding is a difficult and time-consuming task, so it’s best to leave it to someone with experience. In addition, professionals have access to better equipment and techniques, which means they can better grind your floors.

How Can I Find a Reputable Concrete Grinding Company?

If you’re looking for a reputable concrete grinding company, there are a few things you should keep in mind. First, be sure to check online reviews. This will give you an idea of what others have thought of the company’s services. Second, ask for recommendations from friends or family members who have used concrete grinding services in the past. Finally, make sure to get several quotes from different companies before making your final decision.

What are the Risks of DIY Concrete Grinding?

There are a few risks associated with DIY concrete grinding. First, if you’re not experienced with concrete grinding, you could damage your floors. Second, you may not have access to the same high-quality equipment that professionals use. This could result in an inferior grind. Finally, it’s important to be aware of the health risks associated with concrete dust. If you inhale too much concrete dust, it can lead to respiratory problems.

While there are some risks associated with DIY concrete grinding, it’s generally safe as long as you take the necessary precautions. If you’re not sure whether or not you should attempt to grind your own floors, it’s best to consult with a professional.

Is Concrete Grinding Right for My Floors?

Concrete grinding is a great way to get new smooth, and clean floors. However, it’s important to ensure that concrete grinding is right for your floors. If your floors are in good condition, there’s no need to grind them down. In addition, if you’re planning on painting your floors, it’s best to wait until after the grinding process is complete. Finally, be sure to consult with a professional before making any decisions about concrete grinding.

When it comes to concrete grinding, it’s important to take the time to do it right. By following these tips, you can ensure that your floors will look their best for years to come!

FAQ About Concrete Grinding and Cleaning

1. What is concrete grinding?

Concrete grinding is the process of removing any material from a concrete surface using an abrasive tool. The purpose of grinding is usually to improve the appearance of the concrete, but it can also be used to remove stains or to prepare the surface for other treatments.

2. How do I clean up after concrete grinding?

It’s important to clean up after concrete grinding to ensure that your floor looks its best. Be sure to sweep and mop the floor regularly, and avoid using harsh cleaners or abrasive pads.

3. Why is cleaning after grinding so important?

Cleaning up after concrete grinding is important for a number of reasons. First, it helps to ensure that your new flooring looks its best. If there is any debris or dirt left behind, it can dull the appearance of your floor. Second, it helps to protect your floor from stains and damage. Harsh cleaners and abrasive pads can damage the floor, so it’s important to avoid them. Finally, regular cleaning will help to extend the life of your floor.

Recent Posts

Most Popular Types of Floor Coating Sealers

Most Popular Types of Floor Coating Sealers

7 Creative Ways You Can Decorate Your Home With Epoxy

7 Creative Ways You Can Decorate Your Home

Do your floors look dull and lifeless? Are they in need of a makeover? If so, you may be considering floor coating sealers. Floor coating sealers are a great way to give your floors a new lease on life. They can protect your floors from wear and tear, and they can also make them look great.

However, many home and business owners are unaware of the different types of floor coating sealers available. This article will provide you with a brief overview of the most popular types of floor coating sealers to make an informed decision about which product is right for your needs.

1. Water-based Sealers

Water-based sealers are the most popular floor coating sealer on the market. They are easy to apply, and they dry quickly. Water-based sealers are also safe to use around children and pets. However, water-based sealers may not be as durable as other sealers.

2. Oil-based Sealers

Oil-based sealers are more durable than water-based sealers. They can withstand heavy traffic, and they are resistant to stains. However, oil-based sealers can be difficult to apply, and they often have a strong odor.

3. Epoxy Sealers

Epoxy sealers are the most durable floor coating sealer available. They are resistant to stains, scratches, and scuffs. Epoxy sealers also create a high-gloss finish that is easy to clean. However, epoxy sealers can be difficult to apply, and they require a long curing time.

4. Polyurethane Sealers

Polyurethane sealers are a type of water-based sealer. They are less durable than epoxy sealers, but they are easier to apply. Polyurethane sealers also have a lower odor than oil-based sealers.

5. Acrylic Sealers

Acrylic sealers are the most popular type of water-based sealer. They are easy to apply, and they dry quickly. Acrylic sealers are also safe to use around children and pets. However, acrylic sealers may not be as durable as other sealers.

How Do I Know Which Sealer is Right for Me?

The type of floor coating sealer you choose should depend on your needs and preferences. If you are looking for a durable sealer, epoxy or polyurethane may be the best option. If you are looking for an easy-to-apply sealer, water-based or acrylic sealers may be the best option. If you are unsure which type of sealer is right for you, consult with a professional flooring contractor.

DIY Floor Coating Sealer Installation vs. Professional Installation

Many home and business owners choose to install their own floor coating sealers. However, professional installation is always recommended. Floor coating sealer installation is a complex process, and it requires special equipment and training. If you are not experienced in floor coating sealer installation, it is best to leave the job to the professionals.

Hiring a Professional Flooring Contractor

Contact a professional flooring contractor today if you are interested in having your floors coated with a floor coating sealer. A professional flooring contractor will be able to assess your needs and recommend the best type of sealer for your floors. They will also be able to provide you with a free estimate for the installation cost.

You should consider these questions when hiring a professional flooring contractor:

· What is the cost of installation?

· What type of sealer do they recommend?

· How long will the installation process take?

· Do they have experience installing floor coating sealers?

· Do they have liability insurance?

· Are they bonded?

Be sure to ask for references from past clients and check those references before hiring a contractor. By taking these precautions, you can be sure that you are hiring a reputable and qualified professional.

Learn the Risks of a DIY Installation

Installing a floor coating sealer is a complex process that requires special equipment and training. If you are not experienced in floor coating sealer installation, you could end up damaging your floors. You could also void the warranty on your flooring by attempting a DIY installation.

In order to avoid these risks, it is best to leave the job to the professionals. Hiring a professional flooring contractor is the best way to ensure that your floors are coated properly and that the job is done right.

By following these tips, you can be sure that you are making the best decision for your floors. Floor coating sealers are an important investment, and you should be sure to choose the right product for your needs. With so many options on the market, it is important to do your research before making a purchase. Consulting with a professional flooring contractor is the best way to ensure that you are choosing the right product for your floors.

FAQ About Floor Coating Sealers

1. What are floor coating sealers?

Floor coating sealers are products applied to floors to protect them from wear and tear. Sealers can be made from a variety of materials, including acrylic, epoxy, polyurethane, and water-based formulas.

2. What are the most popular types of floor coating sealers?

The most popular types of floor coating sealers are acrylic, epoxy, polyurethane, and water-based formulas.

3. How do I know which type of sealer is right for me?

The type of floor coating sealer you choose should depend on your needs and preferences. If you are looking for a durable sealer, epoxy or polyurethane may be the best option. If you are looking for an easy-to-apply sealer, water-based or acrylic sealers may be the best option. If you are unsure which type of sealer is right for you, consult with a professional flooring contractor.

4. Can I install my own floor coating sealer?

Many home and business owners choose to install their own floor coating sealers. However, professional installation is always recommended. Floor coating sealer installation is a complex process, and it requires special equipment and training. If you are not experienced in floor coating sealer installation, it is best to leave the job to the professionals.

5. How much does it cost to have my floors coated with a floor coating sealer?

The cost of having your floors coated with a floor coating sealer will vary depending on the type of sealer you choose and the size of your project. Be sure to get a free estimate from a professional flooring contractor before making a decision.

Recent Posts

Call Now 213-513-5290!